The Ultimate Guide to Getting Started with one-cashbook.in
Managing your business finances shouldn't require a degree in accounting. Whether you are running a food truck, managing a consulting firm, or tracking petty cash for a retail store, one-cashbook.in is designed to make tracking your daily cash, expenses, and receipts completely effortless.
Here is a step-by-step guide to setting up your account, logging your first transactions, and getting the most out of your digital cashbook.
1. Setting Up Your Account
Getting into your dashboard takes just a few seconds.
- Sign In: Head to the homepage and click Sign Up or Log In. Use the Continue with Google button for instant, secure access without needing to remember a new password.
- Secure Your Profile: On your first login, you will be prompted to add your phone number. This ensures your account stays secure and makes account recovery easy.
- Create Your Business: Set up your digital workspace by entering your Business Name. You can also select your Business Category (like Event Venue or Startup), choose your Business Type (like Sole Proprietorship or Company), and set your local currency.
2. Setting Up Your Cashbooks
Think of a "Cashbook" as a digital folder for a specific set of funds. You can create as many cashbooks as your business needs.
- Navigate to Cashbooks under the Bookkeeping menu on the left side of your dashboard.
- Click + Create Your First Cashbook.
- Give it a clear name. For example, you might create one cashbook called "Petty Cash" for day-to-day office expenses, and another called "Cash Reserves" for broader business funds.
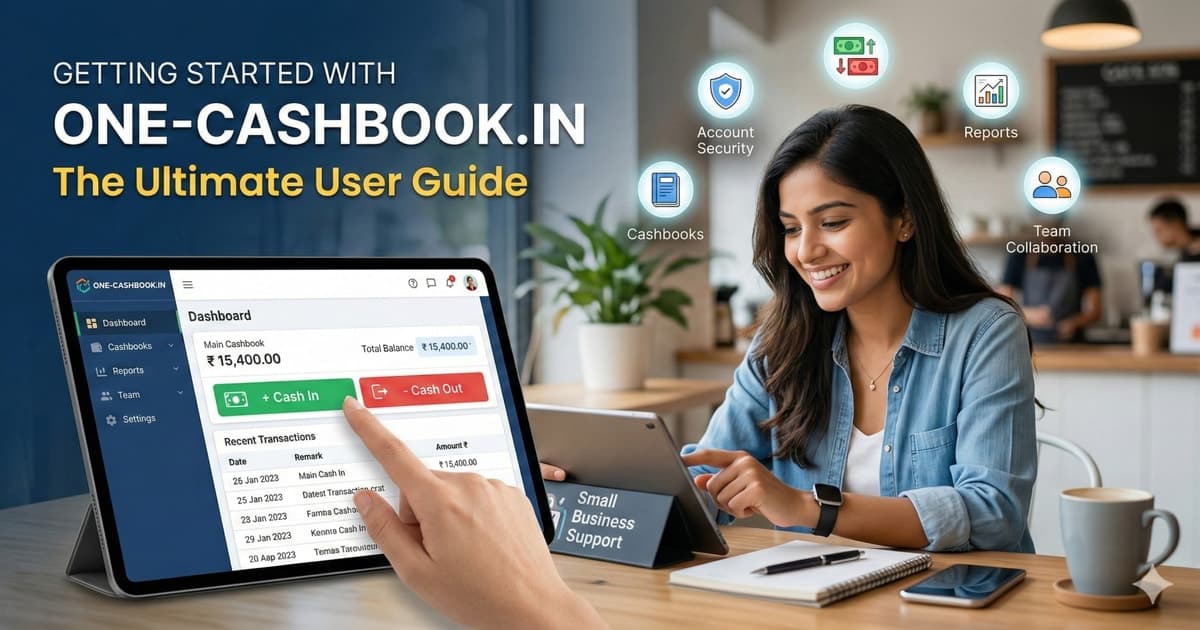
3. Logging Your Transactions (Cash In & Cash Out)
Logging money moving in and out of your business is where one-cashbook.in truly shines.
- Choose Your Action: Open your chosen Cashbook and click either the green + Cash In button (for money received) or the red - Cash Out button (for money spent).
- Enter the Basics: Select the date, enter the amount, and type a brief remark (like "Sales return" or "Office supplies") so you remember what the transaction was for.
- Tag the Details: You can instantly assign the transaction to a specific Party (like a customer, supplier, or staff member), a Category (like receipts or expenses), and a Payment Mode (Cash, UPI, Credit Card, etc.). If the party or category doesn't exist yet, simply click the + sign to create it right from the entry screen!
- Save or Keep Going: Click Save to log the transaction and return to your dashboard, or click Save & Add if you have a stack of receipts you want to enter one after the other.
4. Generating Instant Reports
When it is time to review your finances or hand things over to your accountant, generating a report takes one click.
- Click the Reports button inside your cashbook.
- Select your desired date range using the calendar drop-down.
- Choose the type of report you need, such as a Transaction List, Financial Summary, or Income Statement.
- Download your comprehensive data instantly as a PDF or an Excel spreadsheet.
5. Collaborating with Your Team
You do not have to manage the books alone. You can securely invite your team members to help.
- Go to Business Settings on the left menu, then select Team Members.
- Click Invite Member and enter your colleague's email address.
- Assign a Role: * Admin: Full access to manage business settings and members.